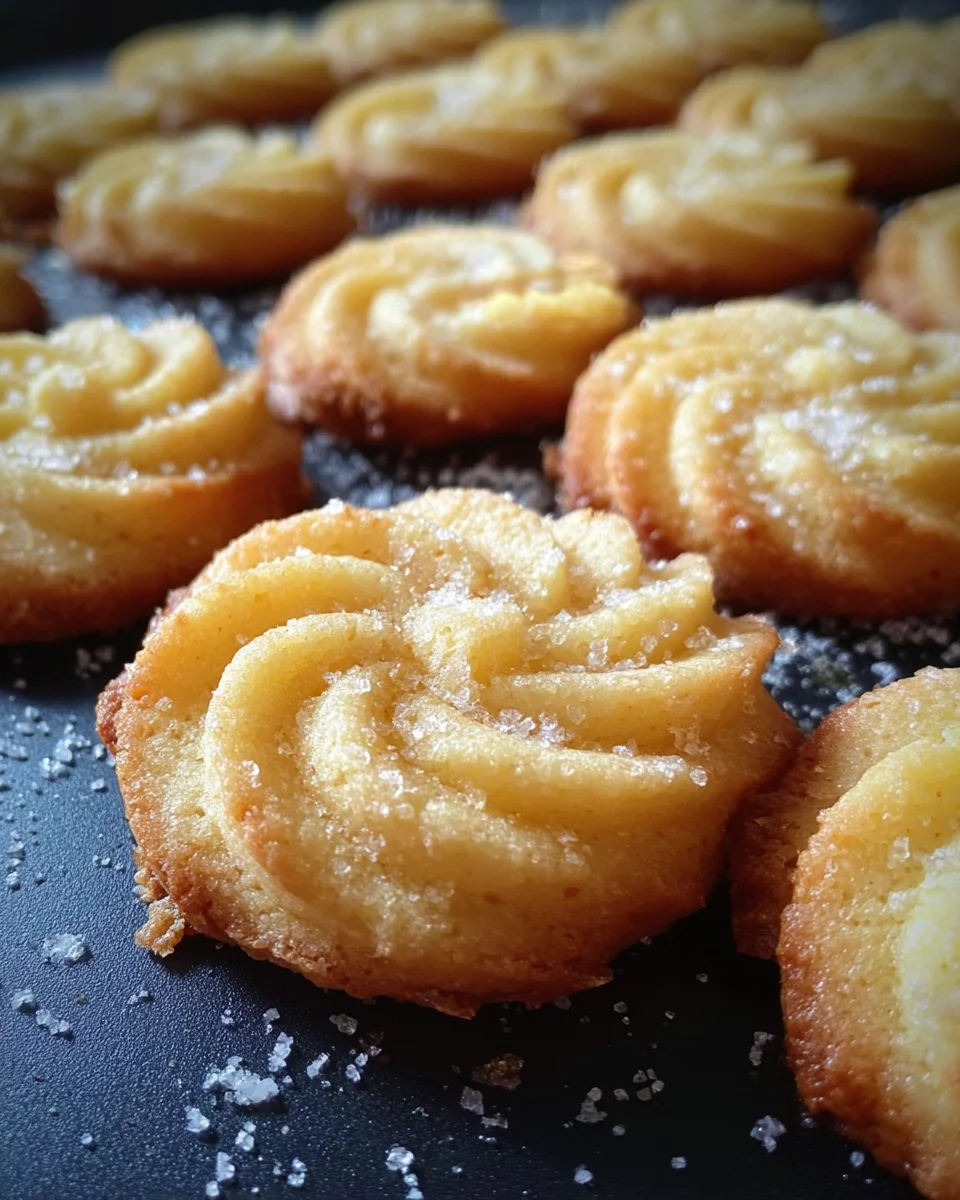
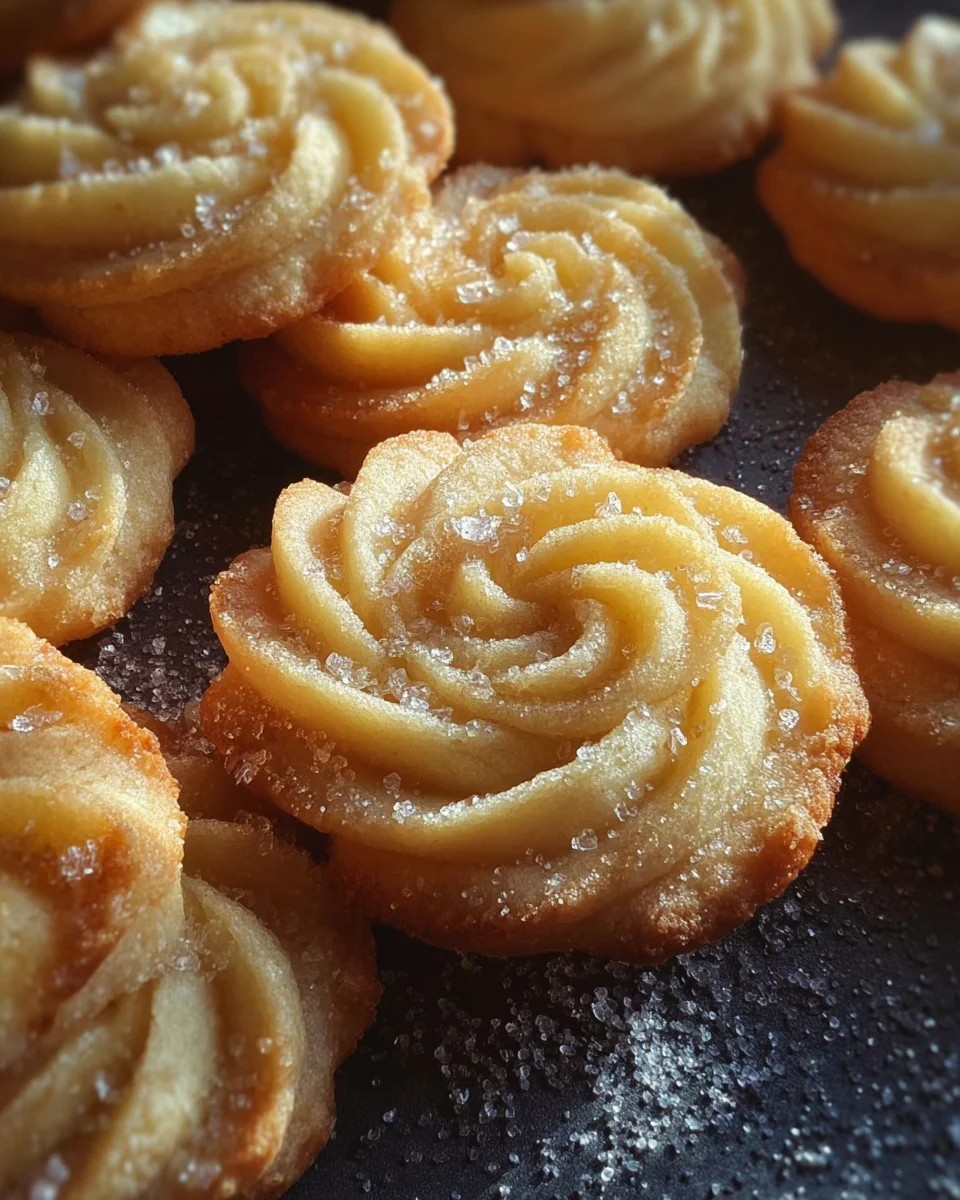
Light, crisp, and delicate, Danish Butter Cookies are a timeless treat that melt in your mouth.
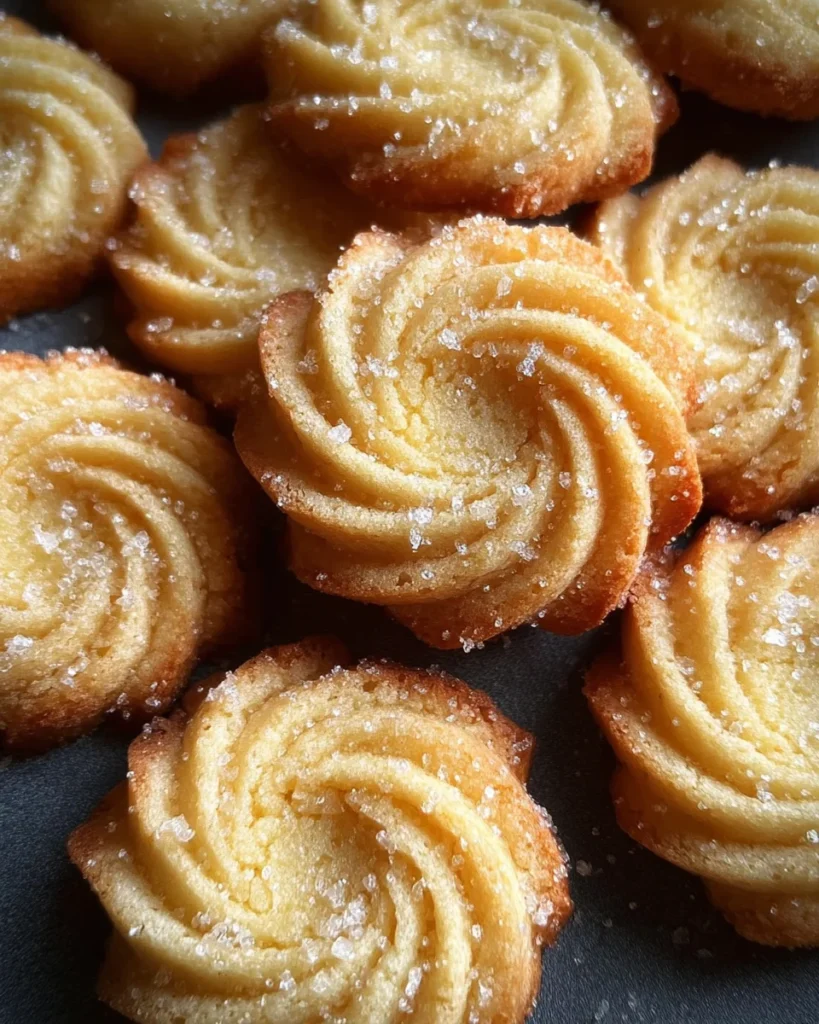
These delightful cookies are perfect for any occasion, from cozy family gatherings to festive holiday celebrations. With just four basic ingredients, this easy recipe ensures everyone can enjoy the rich buttery flavor and satisfying crunch of these cookies.
Why You’ll Love This Recipe
- Simple Ingredients: Only four basic items needed to create delicious cookies.
- Quick Preparation: The recipe takes just 15 minutes of prep time, making it perfect for busy bakers.
- Versatile Treat: Great for breakfast, snacks, or dessert—perfect for any time of day.
- Perfect Gift: Pack them in a decorative box to share with friends and family.
- Customizable Flavor: Add chocolate chips or nuts for a personal twist on the classic recipe.
Tools and Preparation
Before you start baking, gathering the right tools will make the process smoother and more enjoyable. Here’s what you’ll need.
Essential Tools and Equipment
- Stand mixer or handheld mixer
- Mixing bowl
- Spatula
- Piping bag with a star tip
- Baking sheet
- Parchment paper or silicone mat
Importance of Each Tool
- Stand mixer or handheld mixer: Essential for achieving the light and fluffy texture needed when creaming butter and sugar.
- Piping bag with a star tip: This tool helps create beautifully shaped cookies that look as good as they taste.
Ingredients
For the Cookies
- ½ cup butter (at room temperature)
- ½ cup powdered sugar
- 1 teaspoon vanilla extract
- 1 cup cake flour OR all-purpose flour (See note 1)
How to Make Danish Butter Cookies
Step 1: Softening the Butter
Begin by getting the butter out of the refrigerator at least an hour before baking. It should be soft to the touch but not melted.
Step 2: Creaming Ingredients
Cream together the butter, powdered sugar, and vanilla extract using your stand mixer or handheld mixer. Mix for about 5 to 8 minutes until the mixture is light in color and fluffy in texture.
Step 3: Incorporating Flour
Use a spatula to scrape down the sides of the bowl. Sift in flour slowly—about 1/3 cup (40g) at a time—and gently fold it into the creamed mixture until fully combined.
Step 4: Preparing Piping Bag
Transfer your cookie dough onto a sheet of plastic wrap. Roll it into a log shape. Cut a hole in one end of the plastic wrap and place it into your piping bag fitted with a flower-tipped nozzle.
Step 5: Piping Cookies
Pipe the dough onto a baking sheet lined with parchment paper or a silicone mat using your 1M open star piping tip.
Step 6: Adjusting Dough Consistency
If you find that your dough is too stiff to pipe easily, add one tablespoon of warm milk to soften it up.
Step 7: Chilling Dough
Place your piped cookies in the refrigerator for about 30 minutes. This step helps prevent spreading during baking, ensuring they maintain their piped shape.
Step 8: Adding Sugar
Before baking, sprinkle granulated sugar over each cookie if desired; otherwise, leave them plain.
Step 9: Baking
Bake in a preheated oven at 300°F (150°C) for approximately 15 minutes or until the edges turn golden brown.
Step 10: Cooling
Once baked, remove from oven and allow cookies to cool on the baking sheet for about 10 minutes before serving or storing them in an airtight container.
How to Serve Danish Butter Cookies
Danish Butter Cookies are delightful treats that can be enjoyed in various ways. Whether you’re hosting a tea party or simply indulging at home, here are some serving suggestions to elevate your experience.
With Tea
- Pair your cookies with a warm cup of tea for a classic combination. The buttery flavor complements the aroma of the tea beautifully.
As a Gift
- Package these cookies in a decorative tin or box for a thoughtful gift. They’re perfect for holidays or special occasions.
With Ice Cream
- Serve Danish Butter Cookies alongside a scoop of your favorite ice cream. The crunchy texture contrasts wonderfully with the creaminess of the ice cream.
At Breakfast
- Enjoy these cookies as a quick breakfast option. Their lightness makes them suitable for pairing with fruit or yogurt.
As Party Favors
- Offer them as party favors at birthdays or gatherings. Guests will appreciate this sweet takeaway!
How to Perfect Danish Butter Cookies
To achieve the best Danish Butter Cookies, consider these helpful tips that will enhance their flavor and texture.
- Use room temperature butter: Ensures proper creaming and results in lighter cookies.
- Sift flour before use: This helps prevent clumps and results in a smoother dough.
- Chill the dough: Refrigerating the piped cookies helps maintain their shape while baking.
- Experiment with flavors: Add lemon zest or almond extract for a unique twist on the traditional recipe.
- Don’t overbake: Keep an eye on them as they bake to ensure they remain tender and melt-in-your-mouth delicious.
Best Side Dishes for Danish Butter Cookies
Danish Butter Cookies pair well with several side dishes that complement their sweet, buttery flavor. Here are some great options:
- Fresh Fruit Salad: A mix of seasonal fruits adds freshness and balances out the sweetness of the cookies.
- Yogurt Parfait: Layer yogurt with granola and berries for a refreshing side that contrasts nicely with the cookies’ richness.
- Cheese Platter: A selection of cheeses provides savory notes that enhance the cookie’s sweetness.
- Coffee: A hot cup of coffee offers warmth and boldness, making it an ideal companion to these delicate treats.
- Chocolate Dipped Strawberries: The elegance of chocolate-covered strawberries pairs beautifully with buttery cookies.
- Nut Mix: A small bowl of mixed nuts adds crunch and saltiness, balancing out the sweetness perfectly.
Common Mistakes to Avoid
Baking Danish Butter Cookies can be simple, but a few common mistakes can ruin your batch. Here are some pitfalls to watch out for:
- Using Cold Butter: If your butter isn’t at room temperature, it won’t cream properly with the sugar. Always let it sit for at least an hour before baking.
- Overmixing the Dough: Mixing too long can lead to tough cookies. Stop once you achieve a light and fluffy texture.
- Not Chilling the Dough: Skipping the refrigeration step may cause your cookies to spread too much while baking. Always chill them for at least 30 minutes.
- Incorrect Flour Measurement: Too much flour can make your cookies dry and crumbly. Use a kitchen scale or spoon and level method for accuracy.
- Skipping Parchment Paper: Baking directly on a sheet can lead to sticking. Always line your baking sheet with parchment paper or a silicone mat.
- Ignoring Baking Time: Every oven is different; keep an eye on your cookies as they bake. Remove them once the edges start turning golden.
Storage & Reheating Instructions
Refrigerator Storage
- Store Danish Butter Cookies in an airtight container.
- They can last up to 1 week in the refrigerator.
Freezing Danish Butter Cookies
- Place the cookies in a single layer on a baking sheet, freeze until solid, then transfer to a freezer-safe bag.
- These cookies can be frozen for up to 3 months.
Reheating Danish Butter Cookies
- Oven: Preheat to 300°F (150°C) and heat for about 5-7 minutes.
- Microwave: Use low power for about 10-15 seconds, checking frequently.
- Stovetop: Warm briefly in a non-stick pan over low heat for 1-2 minutes.
Frequently Asked Questions
Here are some common questions about Danish Butter Cookies:
How do I make Danish Butter Cookies more flavorful?
You can add lemon zest or almond extract along with vanilla extract for extra flavor depth.
Can I use regular flour instead of cake flour?
Yes, all-purpose flour works fine, but cake flour gives a lighter texture.
How should I store leftover Danish Butter Cookies?
Keep them in an airtight container at room temperature or refrigerate for freshness.
What makes Danish Butter Cookies unique?
Their light and crisp texture, achieved through careful mixing and chilling, sets them apart from other cookie types.
Can I decorate my Danish Butter Cookies?
Absolutely! You can use icing or sprinkles before baking for festive designs.
Final Thoughts
Danish Butter Cookies are not only delicious but also incredibly versatile. Their simplicity allows you to customize them with flavors and decorations of your choice. Whether enjoyed with coffee or as dessert, these cookies are sure to delight anyone who tries them. Don’t hesitate—give this recipe a try today!
Danish Butter Cookies
Danish Butter Cookies are a delightful treat that perfectly balance a light, crisp texture with rich buttery flavor. These classic cookies melt in your mouth, making them an ideal snack for any occasion—whether it’s a cozy family gathering or a festive holiday celebration. With just four simple ingredients, this easy recipe is not only quick to prepare but also versatile enough to customize with your favorite add-ins like chocolate chips or nuts. Whether enjoyed alongside a cup of tea or packaged as thoughtful gifts, these irresistible cookies are sure to impress.
- Prep Time: 15 minutes
- Cook Time: 15 minutes
- Total Time: 30 minutes
- Yield: Approximately 20 cookies 1x
- Category: Dessert
- Method: Baking
- Cuisine: Danish
Ingredients
- ½ cup butter (at room temperature)
- ½ cup powdered sugar
- 1 teaspoon vanilla extract
- 1 cup cake flour or all-purpose flour
Instructions
- Ensure the butter is at room temperature.
- Using a mixer, beat together butter, powdered sugar, and vanilla for 5-8 minutes until fluffy.
- Gradually sift in flour and fold until combined.
- Transfer dough to a piping bag and pipe onto a lined baking sheet.
- Refrigerate piped cookies for 30 minutes to maintain shape during baking.
- Bake at 300°F (150°C) for about 15 minutes until golden at the edges.
- Allow cookies to cool on the sheet for 10 minutes before serving.
Nutrition
- Serving Size: 1 cookie (approximately 15g)
- Calories: 70
- Sugar: 3g
- Sodium: 10mg
- Fat: 4g
- Saturated Fat: 2g
- Unsaturated Fat: 1g
- Trans Fat: 0g
- Carbohydrates: 8g
- Fiber: 0g
- Protein: 1g
- Cholesterol: 10mg